Have multiple themes in a React Native app
I worked with React Native once last year. I was pretty impressed by its ability to apply the same React architecture to build mobile applications. At that time, it was a brief few months working with React Native, so I didn’t have much time playing around with it until recently. For the past 10 days or so I spent most of my spare time learning React Native. And one of the things that I learn is how to have multiple themes for a React Native application. In this blog post, I will describe the basic principles and how I manage multiple themes in my React Native project. This can also be applied to normal React apps since they are just React after all.
Style hierarchy⌗
In my application, I separate component style into 3 layers:
- Default styles which are a set of basic CSS rules that make up the default look and feel of the component
- Specific theme styles which contain mostly colors and will overwrite whatever set in default styles
- Custom styles which are passed to the component as a prop to apply custom styles for each part of the app that uses the component. This one will overwrite the theme and default styles
This is my folder structure
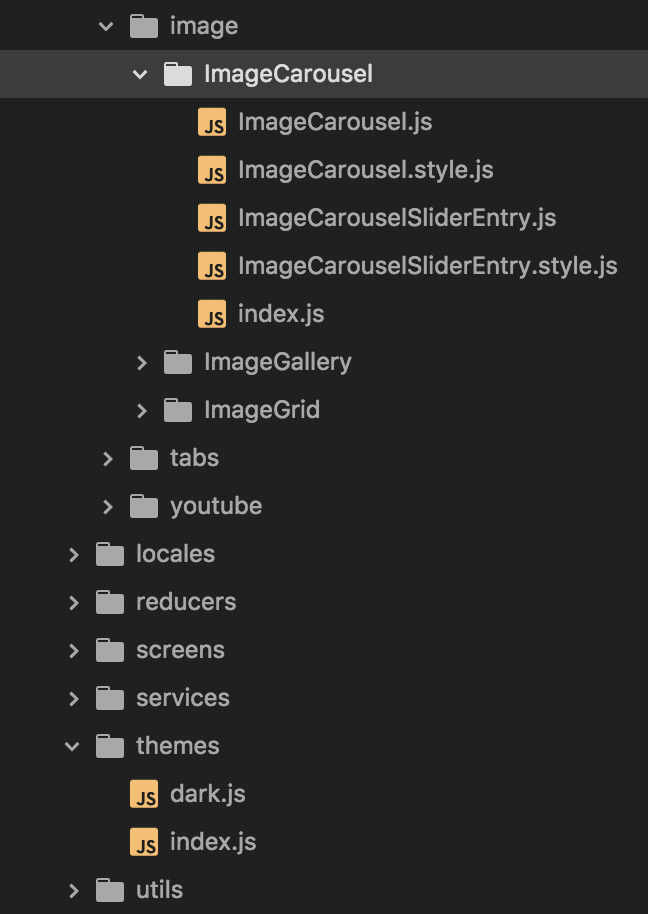
The default styles are in .style.js file, for example ImageCarousel.style.js, and they are just normal React Native style. However, to make my life easier, I divide the component into sections, each section has its own style in the style file. For example
import { StyleSheet } from 'react-native';

export default StyleSheet.create({
  container: {},
  slider: {},
  title: {}
})
Also, to make my life even easier, I limit it so that there are no sub sections for each of the section. In other words, everything below the top level is considered CSS styles.
As for themes, I put everything under themes folder, there is only 1 dark theme for now but I will probably add more in the future. In themes, there is also one more file index.js which contains most of the magic for theme to happen
Inject the theme⌗
One of the most common patterns in React’s world is Higher-Order Components a.k.a HOC. I won’t go into details about it here but for those who don’t know what HOC is about, it’s basically a wrapper around another component to add more behaviours to that component through props (similar to Decorator pattern)
First, let’s look at the code
// @flow

import * as React from 'react';

import PropTypes from 'prop-types';

import { ThemeProvider } from 'react-native-material-ui';

import { uiTheme as darkUiTheme, appTheme as darkAppTheme } from './dark';

const themes = {
  'dark': {
    uiTheme: darkUiTheme,
    appTheme: darkAppTheme,
  },
};

class AppThemeProvider extends React.Component<{appTheme: Object, children: any}, {}> {
  getChildContext() {
    return {
      appTheme: this.props.appTheme,
    };
  }

  render() {
    return this.props.children;
  }
}

AppThemeProvider.childContextTypes = {
  appTheme: PropTypes.object.isRequired,
};

function injectTheme<Base: {}>(themeName: string): (React.ComponentType<Base>) => React.ComponentType<Base> {
  return (BaseComponent) => {
    return (props: Base) => {
      let theme = themes[themeName];
      if (!theme) theme = themes.dark;

      const {
        uiTheme,
        appTheme,
      } = theme;

      return (
        <ThemeProvider uiTheme={uiTheme}>
          <AppThemeProvider appTheme={appTheme}>
            <BaseComponent {...props} />
          </AppThemeProvider>
        </ThemeProvider>
      );
    };
  };
}

export default injectTheme;
I am using ready-made components from react-native-material-ui, and they come with their own “theme injector” named ThemeProvider. And that’s where I learn how to do different themes in React Native.
Here I am just replicating their ideas with a few twists here and there to make it work with my application. Anyway, let’s get started, there are 2 main parts here. Please ignore all the flow stuff, there are there to make sure I don’t mess up anything.
AppThemeProvidersets the context for itschildren. This is one of the perfect use case forcontext. Again, I am not going into details about context. And for those who don’t know aboutcontext, it is a simple way to pass global data to all components.injectThemeis my main actor here to actually apply the context to the component it’s wrapping. Normally, HOC passes new stuff throughprops, but in this case, I am setting the context for the wrapped component.
And this is how I use it
// @flow
import { compose } from 'recompose';

import Screens from './src/screens';
import injectTheme from './src/themes';
import injectRedux from './src/reducers';

const enhancer = compose(
  injectTheme('dark'),
  injectRedux(),
);

export default enhancer(Screens);
Screens is a StackNavigator, and injectRedux simply hooks redux to my containers. And that’s everything for the theme HOC (injector). Now, I need to tell my components to use the injected styles.
Use the injected styles⌗
All my components will need to get the theme from context and merge it with default and custom styles. I can easily do it manually for each component. But since I am lazy, I will implement another HOC to do that for me. Please ignore all the flow annotations, they are not important for the purpose of this blog post.
// @flow
import * as React from 'react';
import { getDisplayName, type HOC } from 'recompose';

import PropTypes from 'prop-types';

import mapValues from 'lodash/mapValues';
import fromPairs from 'lodash/fromPairs';
import uniq from 'lodash/uniq';

import { StyleSheet } from 'react-native';

function injectStyles<Base: {}>(name: string, local?: Object): HOC<{ ...$Exact<Base>, styles?: Object }, Base> {
  return (BaseComponent) => {
    class InjectStyles extends React.Component<Base, { styles: Object }> {
      static displayName = `InjectStyles(${getDisplayName(BaseComponent)})`;
      state = {
        styles: {},
      };

      constructor(props, context) {
        super(props, context);

        const custom = (props.styles || {});
        const localStyles = local || {};

        const appTheme = mapValues({ ...context.appTheme }[name] || {}, (value) => {
          return StyleSheet.flatten(value);
        });

        const customKeys = Object.keys(custom);
        const localKeys = Object.keys(localStyles);
        const appKeys = Object.keys(appTheme);

        const allKeys = uniq(customKeys.concat(localKeys).concat(appKeys));

        const styles = fromPairs(allKeys.map((key) => {
          const localValue = localStyles[key];
          const customValue = custom[key];
          const appValue = appTheme[key];

          return [
            key,
            StyleSheet.flatten([localValue, appValue, customValue].filter((value) => {
              return value !== undefined && value !== null;
            })),
          ];
        }));

        this.state.styles = styles;
      }

      render() {
        const props = { ...this.props };
        delete props.styles;

        return (
          <BaseComponent {...{ ...props, styles: this.state.styles }} />
        );
      }
    }

    InjectStyles.contextTypes = {
      appTheme: PropTypes.object.isRequired,
    };

    return InjectStyles;
  };
}

export default injectStyles;
This implementation is naive but it does the job so I will use it for the time being. Most of the magic happens in the constructor, it picks the correct styles from the theme in context. I have a naming convention for my components, so if a component is named MyComponent, its styles from the theme is myComponent. But injectStyles takes it further by accepting name to specify the attribute name of the component styles in context.
The logic here is simple, when we get the styles, get all “keys” from default (local), custom and theme styles. This assumes the default styles contain all the supported sections, even if they have no styles. Next it just go through the keys and let StyleSheet.flatten do its magical work. There are some lodash involved on the way but it should be pretty obvious from the code sample. The final result is then set to state. I put it to state instead of an instance variable because I might need to change it in the future. Then, render just needs to pass the styles from state to the wrapped component. But before that it needs to delete the “custom” styles from props so that we don’t have duplicate styles.
And this is how I can use it
const enhancer: HOC<*, Props> = compose(injectStyles('imageCarousel', styles));
This is the dark theme
const appTheme = {
  imageCarousel: {
    slider: {
      shadowColor: COLOR.black,
    },
  },
}

Now change it to something else
const appTheme = {
  imageCarousel: {
    slider: {
      shadowColor: 'red',
    },
  },
}
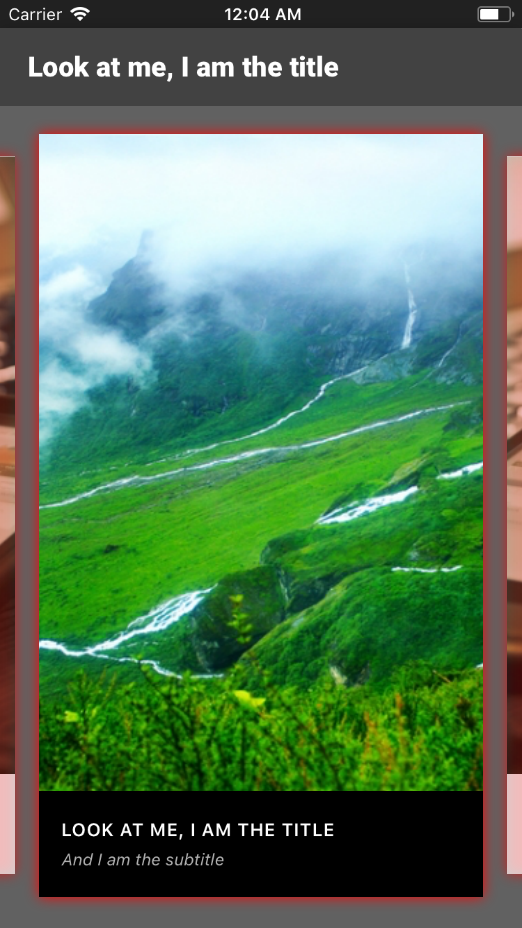
The same thing can also be achieved by setting the styles in props
<ImageCarousel
  styles={{
    slider: {
      shadowColor: 'red'
    }
  }}
  images={images}
  onChange={this.onChangeImage}
  onPress={this.onPressImage}
/>
And…. that is everything to have a multi-theme setup for your React Native application. There is one missing feature, though. It’s not possible to change theme on the fly. I am not sure what is the best way to do it, should it be a function in context to notify AppThemeProvider?, or could it be a function passed through props to all the components? Right now I don’t need to do that but soon I will have to think of something to change the theme on the fly.